


In the previous article introducing the synthesizer, we looked at the basic building blocks on a basic front panel. Now we're ready to dive deeper into each of these building blocks.
VCO: harmonics and octaves
Every sound we hear is made up of many different frequencies. When we play a note, the lowest frequency we hear – the ‘main body’ – is the fundamental. The frequencies above the fundamental, which are related to it in various ways, are called harmonics. (Yes, there can be inharmonic content as well, but we’re keeping it simple.)
Harmonics have been understood for centuries – pipe organ builders know that the longer the pipe, the longer its wavelength, and the lower its frequency. Most relevant to synth design: if you double the length, the note will be one octave lower.
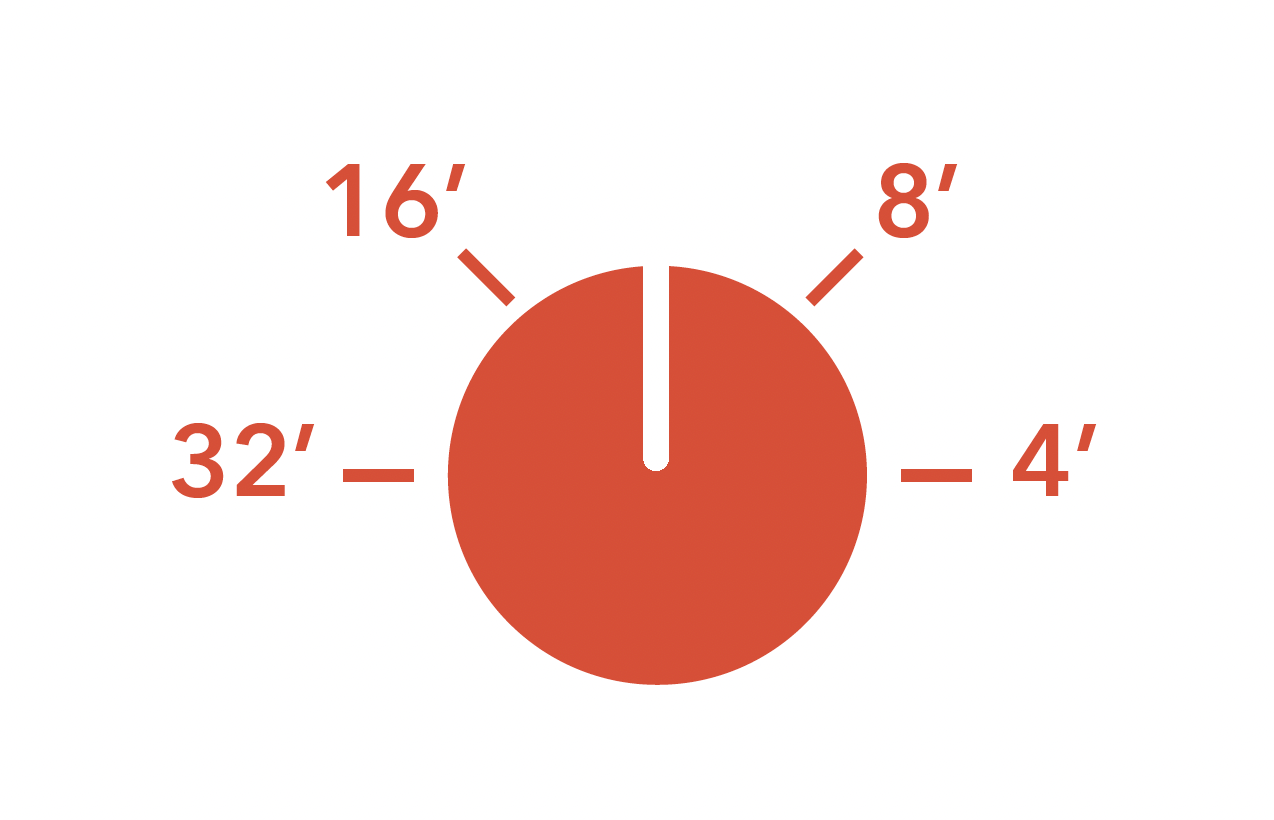
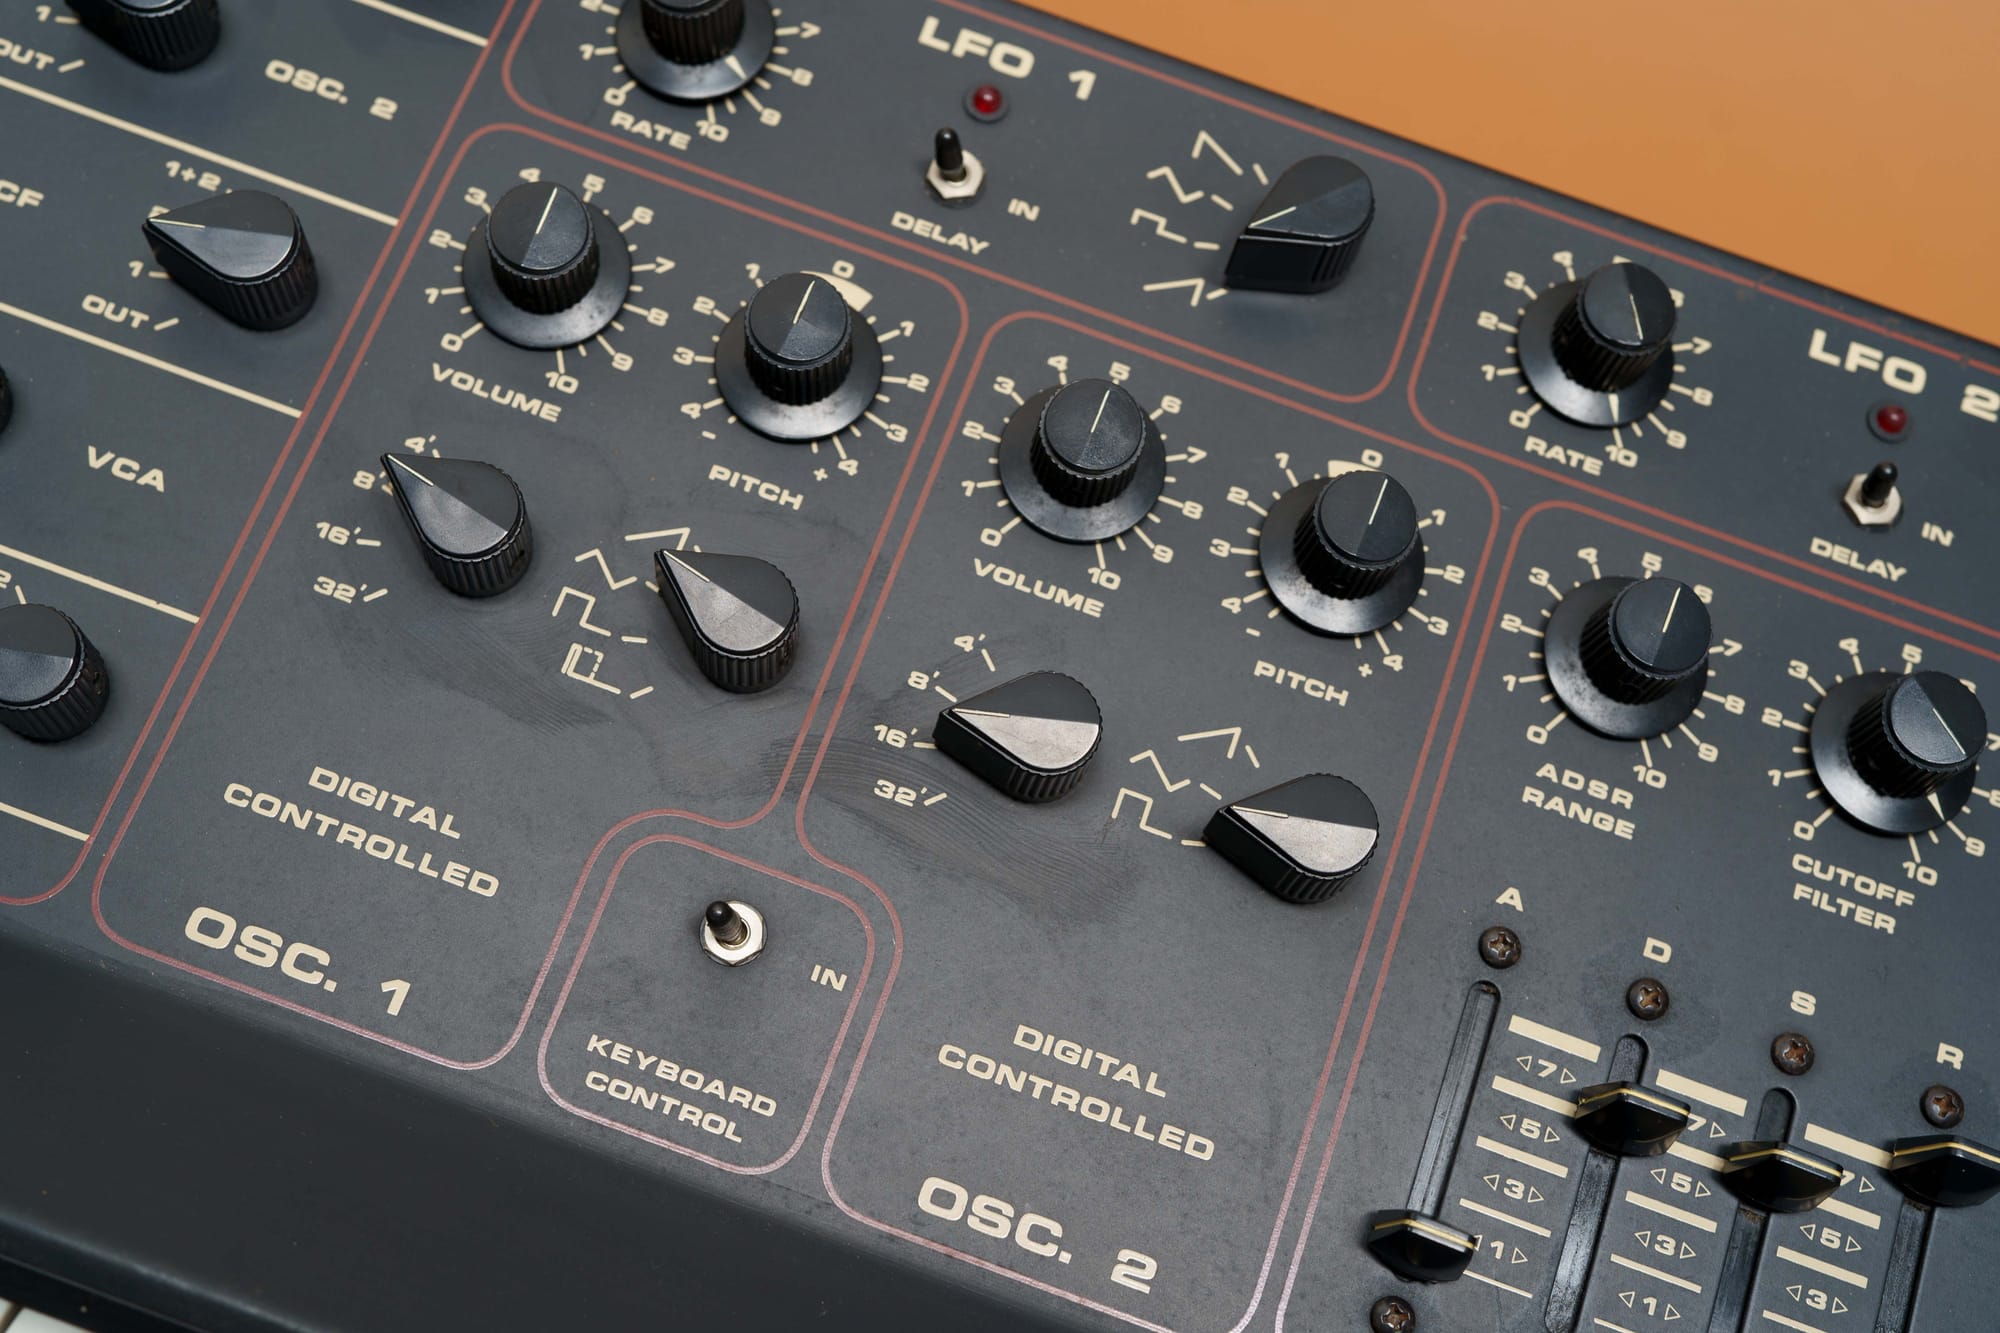
Many synths borrow pipe organ terminology to indicate which octave a VCO is set to. That’s why you’ll often see footages like 32', 16', 8', 4', 2' on VCOs. They indicate different octave choices – the larger the footage, the lower the octave.
VCO: waveforms
When an oscillator creates a sound for us, it has two properties we need to select: not just pitch, including octave, but also waveform. The waveform is the raw sound that comes out of the oscillator before we do anything to it – a specific combination of harmonics.
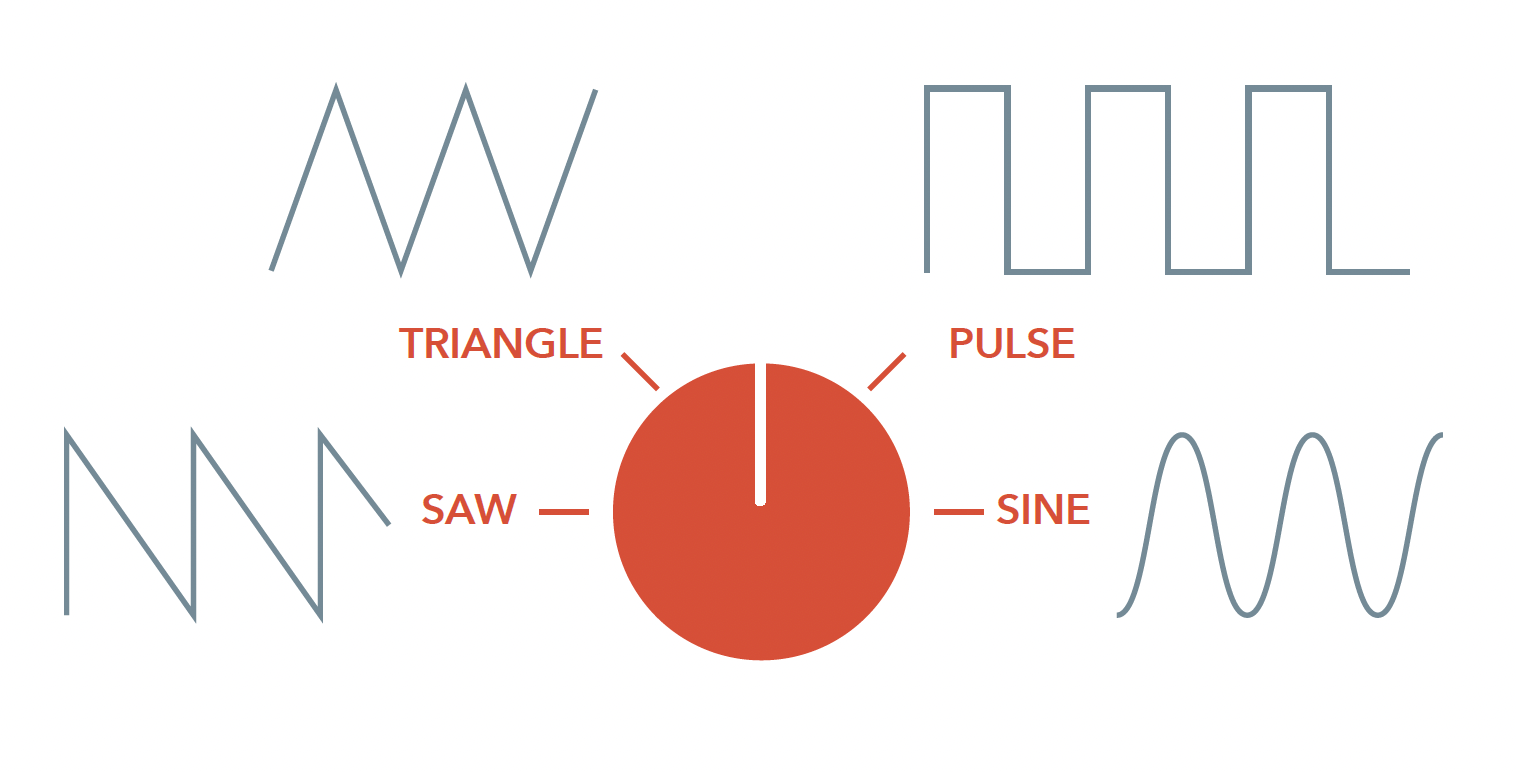
While many waveforms are incredibly complex, many vintage synthesizers do amazing things with just four waveforms. They get their names from how they look when displayed on an oscilloscope, and that’s also how they’re represented on a synth’s front panel – as little shapes.
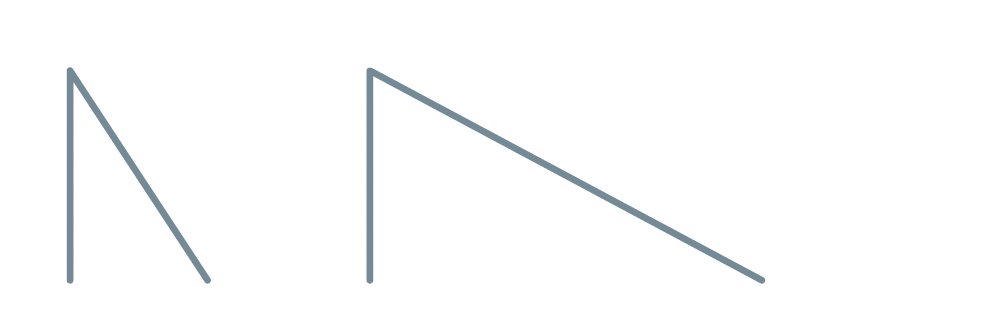
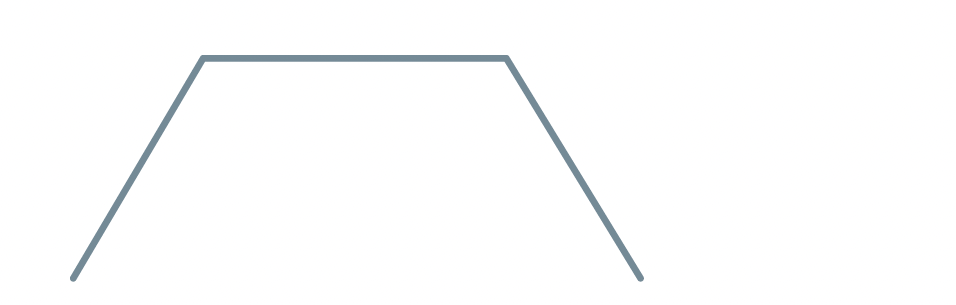
The first three are the sawtooth, triangle, and pulse waves. They’re easy for very simple electronics to generate, and they have a lot of useful harmonics to play with. The fourth is the sine wave, which is just a single fundamental with no harmonics – not as exciting-sounding as the others, but with many important uses.
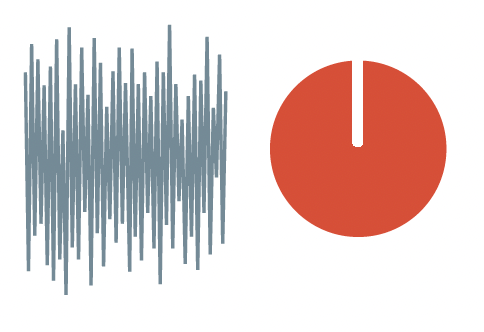
Noise is a blend of all frequencies at once. When all frequencies are represented equally, that’s white noise. If certain frequencies are emphasized, we say the noise is colored. For example, pink noise has more low frequencies.
VCO: pulse width
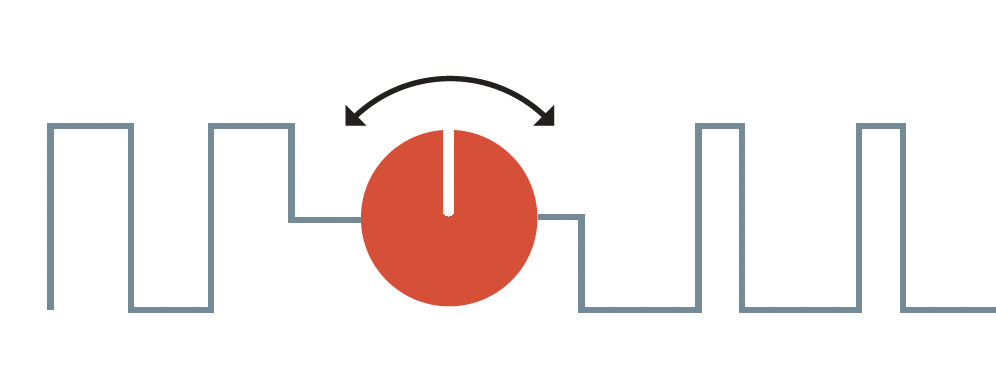
Now, the pulse wave has a little trick hidden in it: if we change the pulse width – the proportion of how much of each cycle is ‘high’ vs. ‘low’ – we change the harmonics and therefore the sound, so one VCO can give us many different sounds.
Simpler synths don’t always give us that option; they pick a couple of widths that sound good (or are useful for modulation) and give them to us as options, and we work with those. The most common is the square wave, where the ‘high’ and ‘low’ parts of the pulse are the same width.
Even cooler, if we modulate the pulse width, turning it up and down over time, the harmonics constantly change, and a simple pulse wave becomes a richly evolving sound. This is called pulse width modulation (PWM), and it’s one of the easiest yet nicest-sounding tricks an oscillator can do.
Mixing everything together
Once we have our VCOs generating the desired waveforms at the desired pitches, it’s time to put them together. That’s where the mixer comes in.
A mixer isn’t hard to understand: it mixes sounds together and lets you set how loud each one is. However, when we mix waveforms, things start to get interesting!
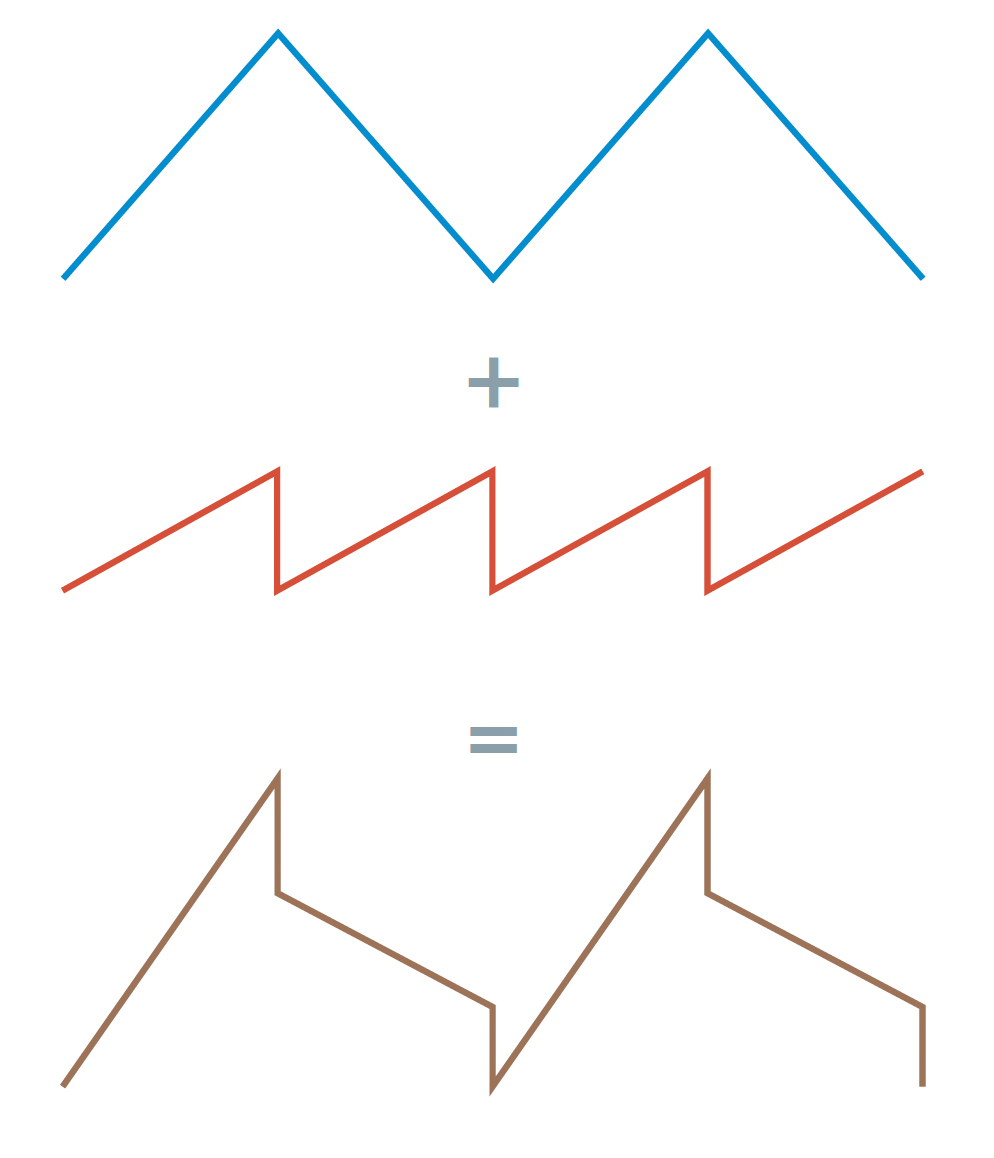
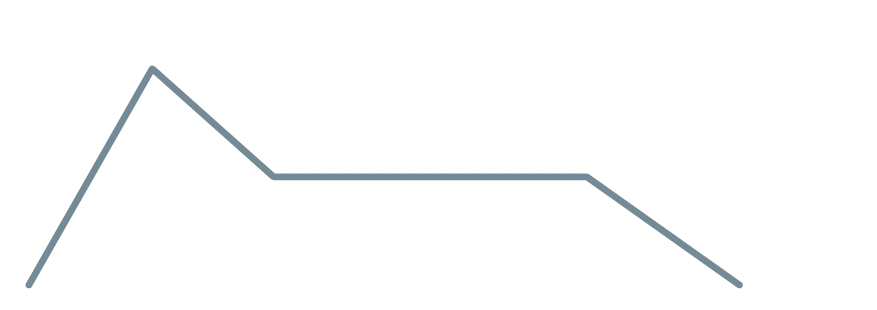
When waveforms are mixed, their harmonics are mixed as well – they become a new waveform with new characteristics, with which we get new sounds. The figure below shows one possible waveform we get from mixing a triangle wave with a sawtooth wave that’s one octave higher.
When a synthesizer has a noise source and/or an external audio input to process other instruments through the synth’s signal path, they will usually have their own knobs on the mixer, so everything is brought together in the proper mix before heading for the filter.
VCF: modes
If you give a filter a sound with a mixture of high and low frequencies, it will let some frequencies pass through unharmed while removing (filtering out) others. Opening a filter lets more frequencies through; closing it lets fewer through.
Filters are usually named for what they let through, not what they stop. There are four common filters:

A lowpass filter (LPF) lets low frequencies through and turns down high frequencies – it takes bright sounds and makes them darker. It’s common for sounds in nature to start with a lot of high-frequency content that dies away quickly, leaving low frequencies to last longer – the lowpass filter mimics that. It’s by far the most common filter you’ll find in a synth.
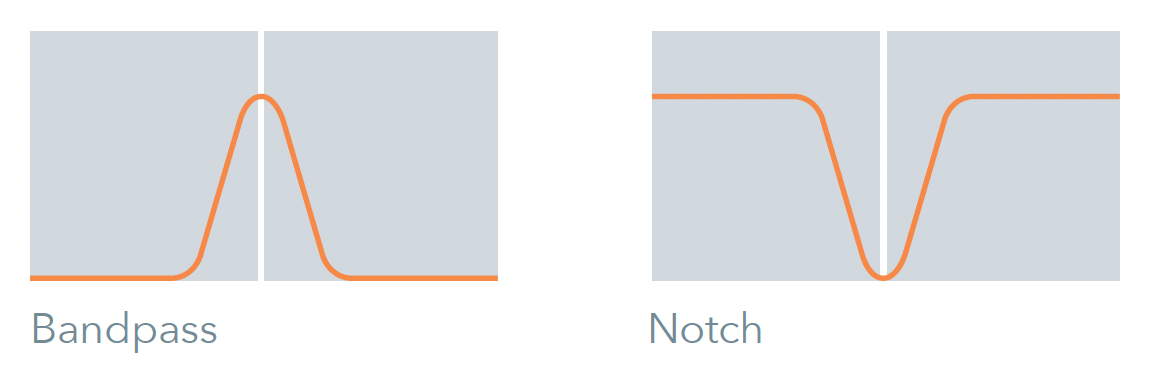
When we want to get rid of the lows and keep the highs, we use a highpass filter (HPF). To keep one set of frequencies and reduce everything above and below them, we use a bandpass filter (BPF), which is usually made from combining highpass and lowpass filters. If we want to cut out a range of frequencies, we use a notch filter, sometimes called a bandstop or band-reject filter.
These different behaviors – lowpass, highpass, etc. – are called modes. So a multi-mode filter is one that can do more than just one kind of filtering. Some filters can switch between modes, while others can smoothly change from one mode to another by turning a knob.
VCF: cutoff and slope
The frequency at which a filter starts to do its work is called the cutoff frequency. It has many other names, which you’ll find in the Glossary; we often just say cutoff, and while it’s not as technically accurate, the term tone is both poetic and easy to understand.
To change the cutoff frequency over time is to make a sound brighter or darker, to change its tone and therefore its entire character – a central sound design concept.
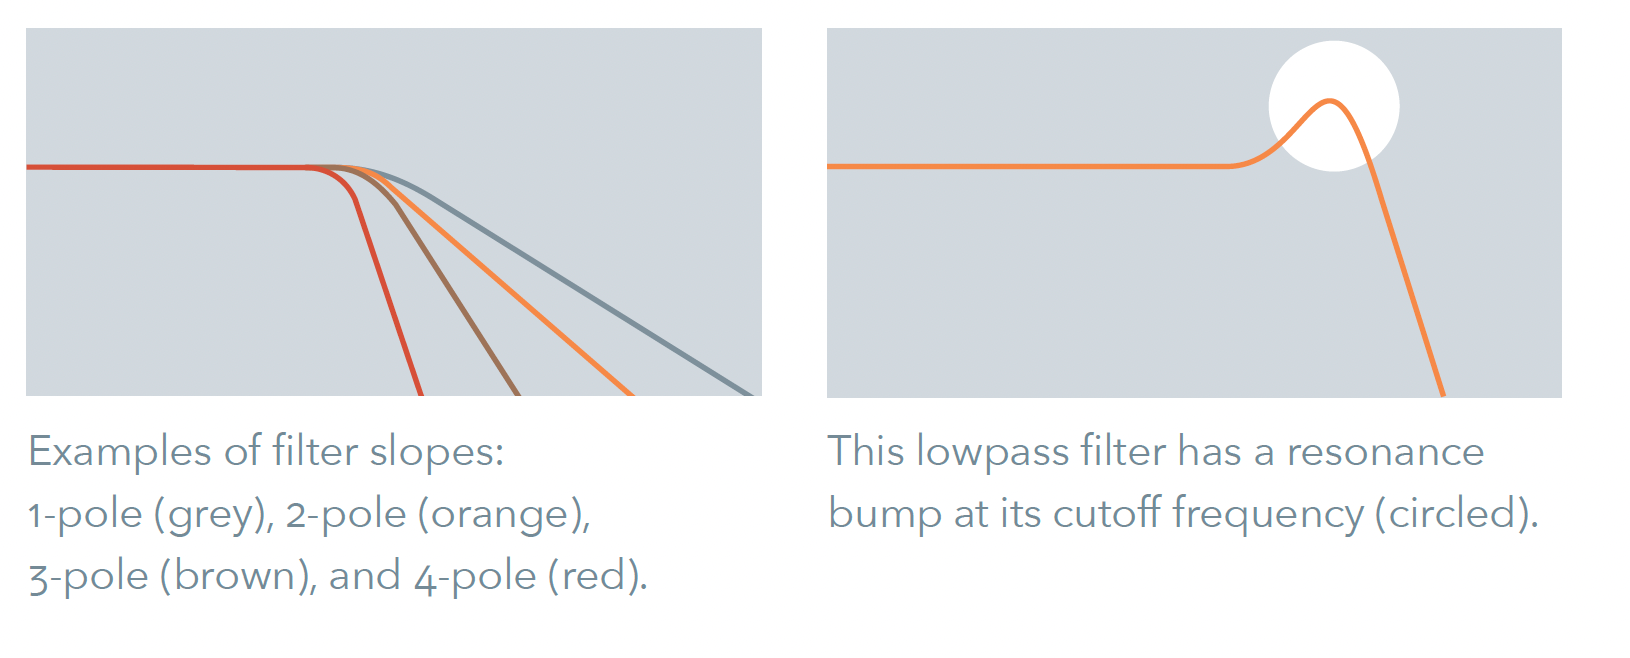
When audio is filtered, frequencies beyond the cutoff are turned down, and the farther you go past the cutoff, the more sound is lost. How quickly sound drops off is called the slope.
A filter with a gentle slope lets a lot of harmonics through, and tends to be buzzier and rougher. A filter with a steep slope will control harmonics more strongly, and generally gives a smoother sound. Both kinds are musically useful!
A common unit of slope is the pole, a term derived from the wiring configuration of certain filter circuits.
VCF: resonance and tracking
Some filters are designed to create controlled feedback (remember how a speaker will howl if you put a microphone too close to it?). This causes a bump of intensity right at the cutoff frequency. We call this resonance.
As you turn up the resonance, you’ll start to hear a ‘whistle’ at the cutoff frequency. If you turn it up high enough, the filter won’t need any audio going into it to make sound at that frequency all by itself. That’s called self-oscillation, and it turns a filter into an extra sound source.
If the cutoff frequency tracks with the keyboard – meaning, the keyboard’s control voltage moves the cutoff frequency the same amount as it changes the VCO pitches – the keyboard can play the self-oscillating filter in tune with the VCOs.
By the way, keyboard tracking is very useful to make, for example, higher notes brighter than lower ones. Sometimes we want just a touch of that, so it’s useful to be able to set the tracking to a smaller amount.
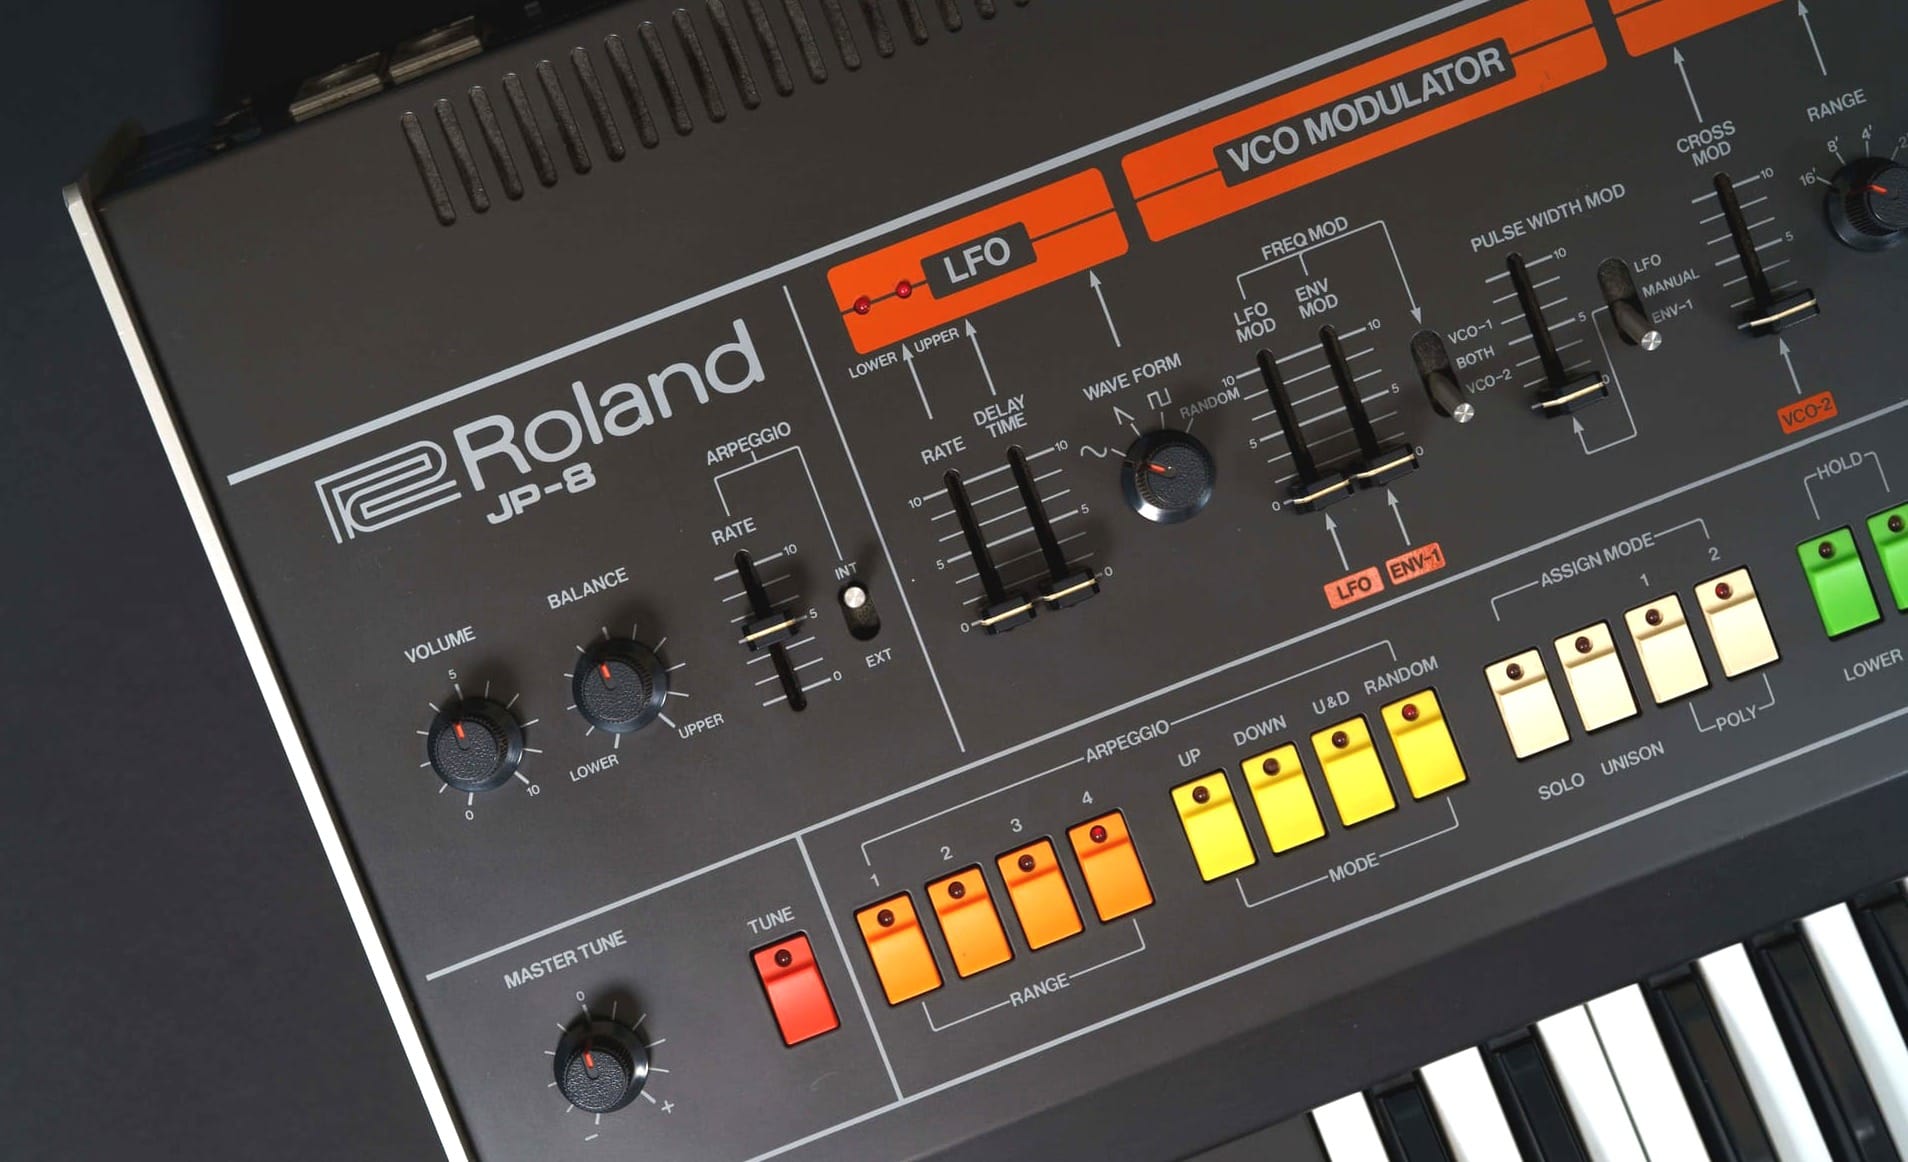
Modulation
We’ve already introduced the idea of modulation. In a synthesizer, one circuit modulates another by sending it an electrical signal that tells it how to act. We mentioned these control voltages already, and how synths do literally everything with them.
Modulation is all about control voltages, and a wide variety of modules exist just to modulate others – we call them modulators. (Not surprising.) One of the most common modulators is the keyboard, which sends control voltages to tell a VCO what pitch to play.
Another is the envelope generator, which applies control voltages to VCO pitch, VCF cutoff, or VCA level, to shape how they behave over time, usually as part of a note you play.
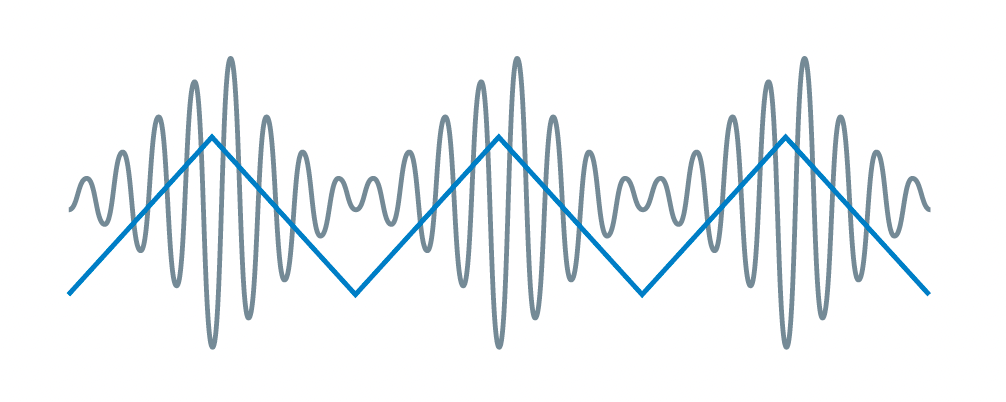
Another is a special type of oscillator, the Low-Frequency Oscillator (LFO). It cycles too slowly to be audi-ble on its own, but can be used as a sort of ‘automatic knob turner’ – put a triangle wave LFO on an VCO’s pitch to make it go up and down a little bit, and you’ve created vibrato. Put it on a VCA’s level and it creates tremolo, as shown in the picture below.
There are complex interactions with fancy names like frequency modulation (FM), amplitude modulation (AM), pulse width modulation (PWM)… but they’re all about control.
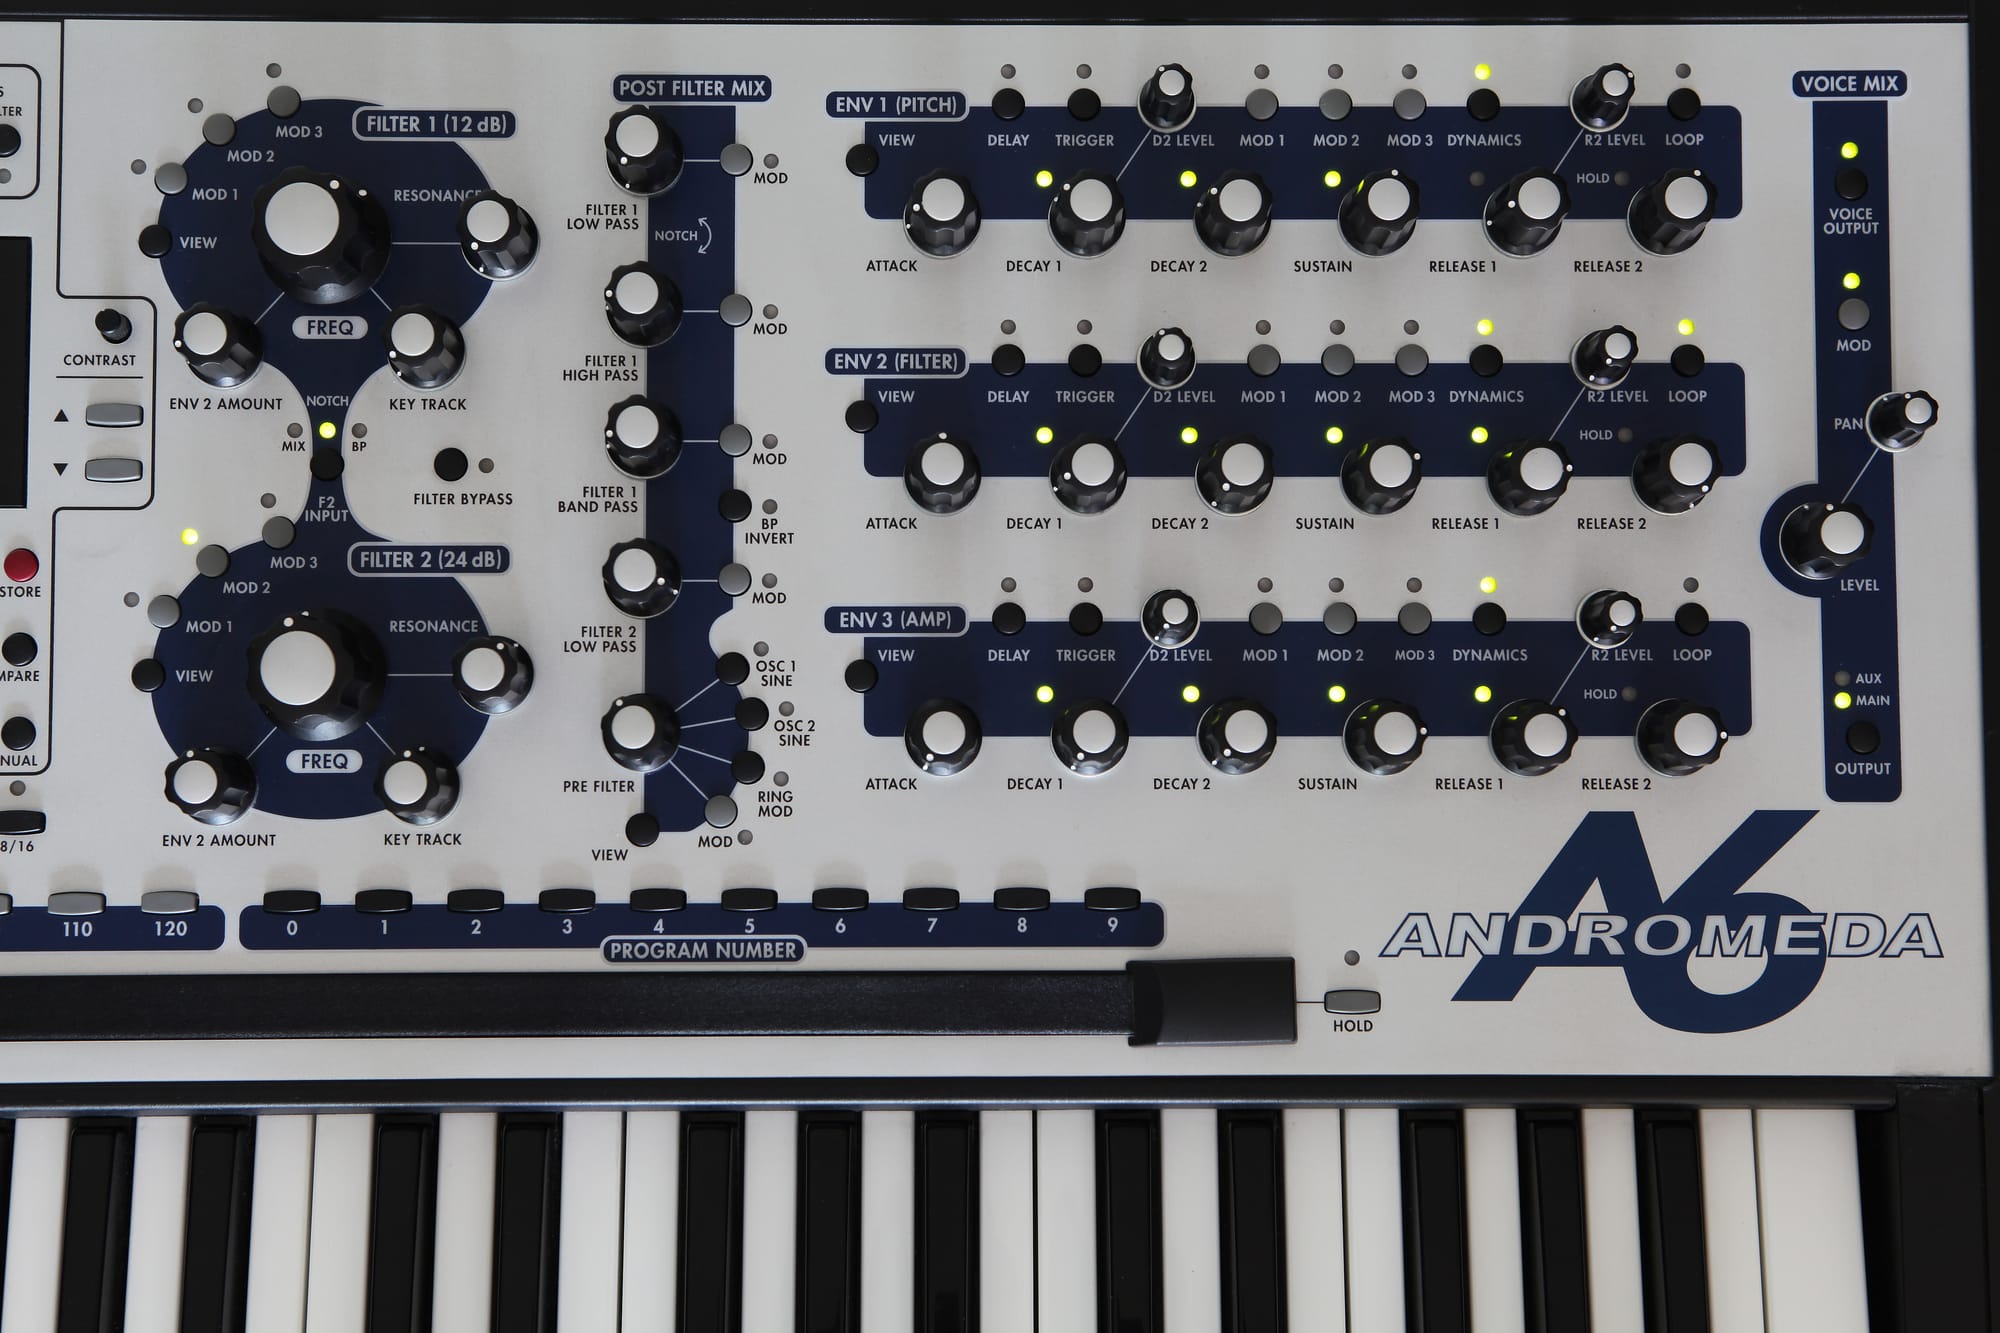
ENV – envelopes
To make a synth actually play notes, you’ll need a module called an envelope generator.
An envelope describes how a sound changes over time from the moment you play a note until the moment the note stops. Play a note on a piano – instantly there’s a loud, bright sound that gradually gets darker and dies away.
Play a note on a violin – the bow scrapes, the note starts from silence and gets louder and brighter (maybe with a tiny rise or fall in pitch at the beginning), keeps going until you stop moving the bow, and then it stops almost instantly.
Now, those notes can be recreated with the help of two or three different envelopes. One controls the volume of the note (a VCA envelope); one controls the tone of the note (a VCF envelope), and one might control the pitch (a VCO envelope). With the help of those envelopes, your oscillator plays a note, the filter shapes its tone, and the amplifier controls its loudness, and you can simulate the changing sound of a piano or a violin... or a sax, or a guitar, or a drum.
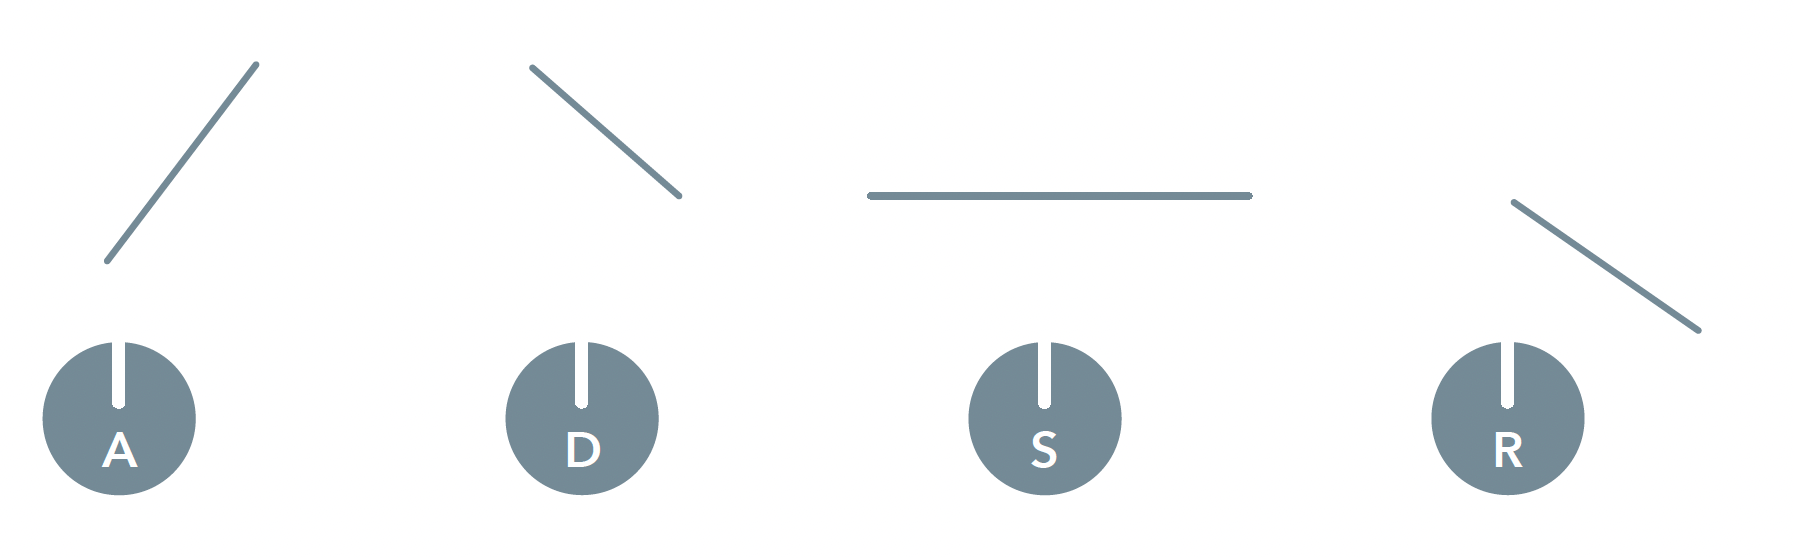
We call the ‘pieces’ of an envelope stages. There can be many or few of them, depending on the design. The vast majority of envelopes are made up of four distinct stages:
Attack: from the moment you press a key until the moment it reaches its peak (volume, tone, or pitch);
Decay: a drop down from the peak, so the start of the note becomes a distinct ‘event’ the ear picks up on;
Sustain: the level the envelope stays at until you let go of the key; and
Release: from the moment you release the key until the note drops back to silence.
Note: We set attack, decay, and release times, but sustain is a level.

Don’t forget the VCA...
Just like mixers, amplifiers are easy to understand – all they do is turn the volume (amplitude) up and down. Many synthesizers don’t even give the VCA any controls of its own – there’s just an envelope to start and stop notes, or just an ‘on’ switch for drones.
While the VCA in the signal path usually isn’t that exciting, it’s a fundamentally important module elsewhere in the synthesizer, not turning audio levels up and down, but turning control voltages up and down.
A VCA is used to tell how much one modulator influences another – a little ‘amount knob’ you can turn up and down. All through every synth, any time there’s a need for a module to be controlled by something more complex than just turning a knob or pushing a button, there will be VCAs in place to control the flow.
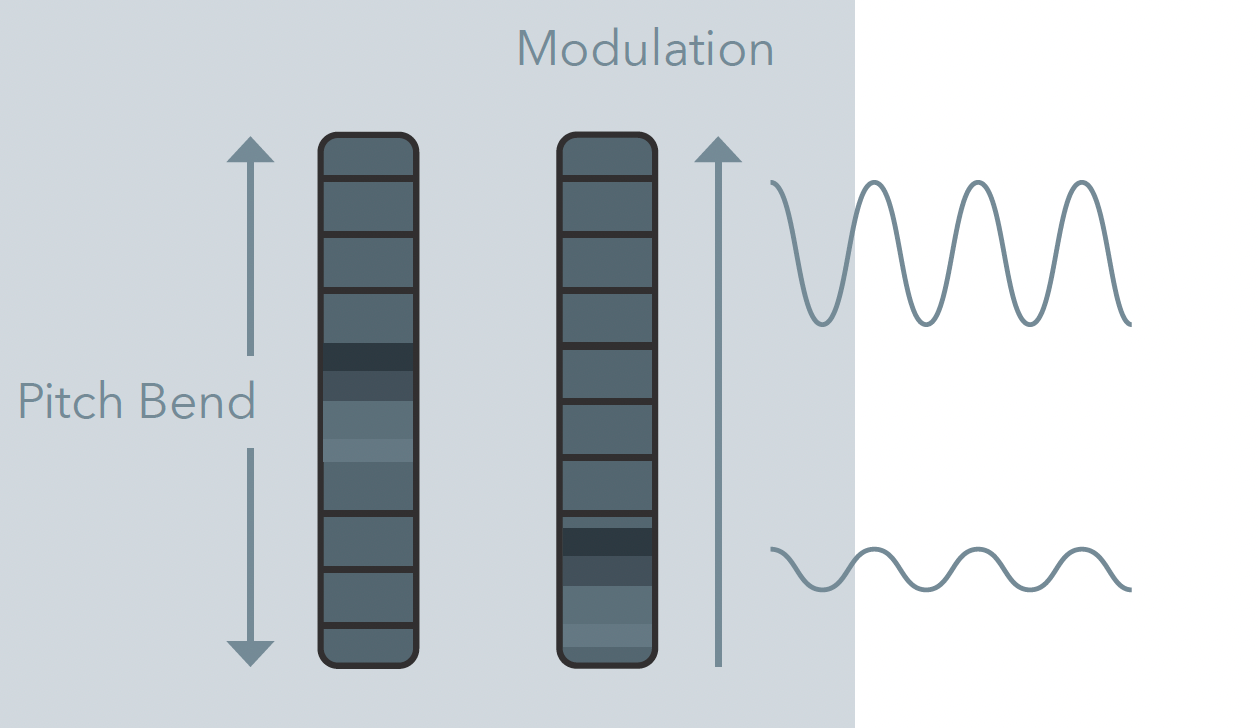
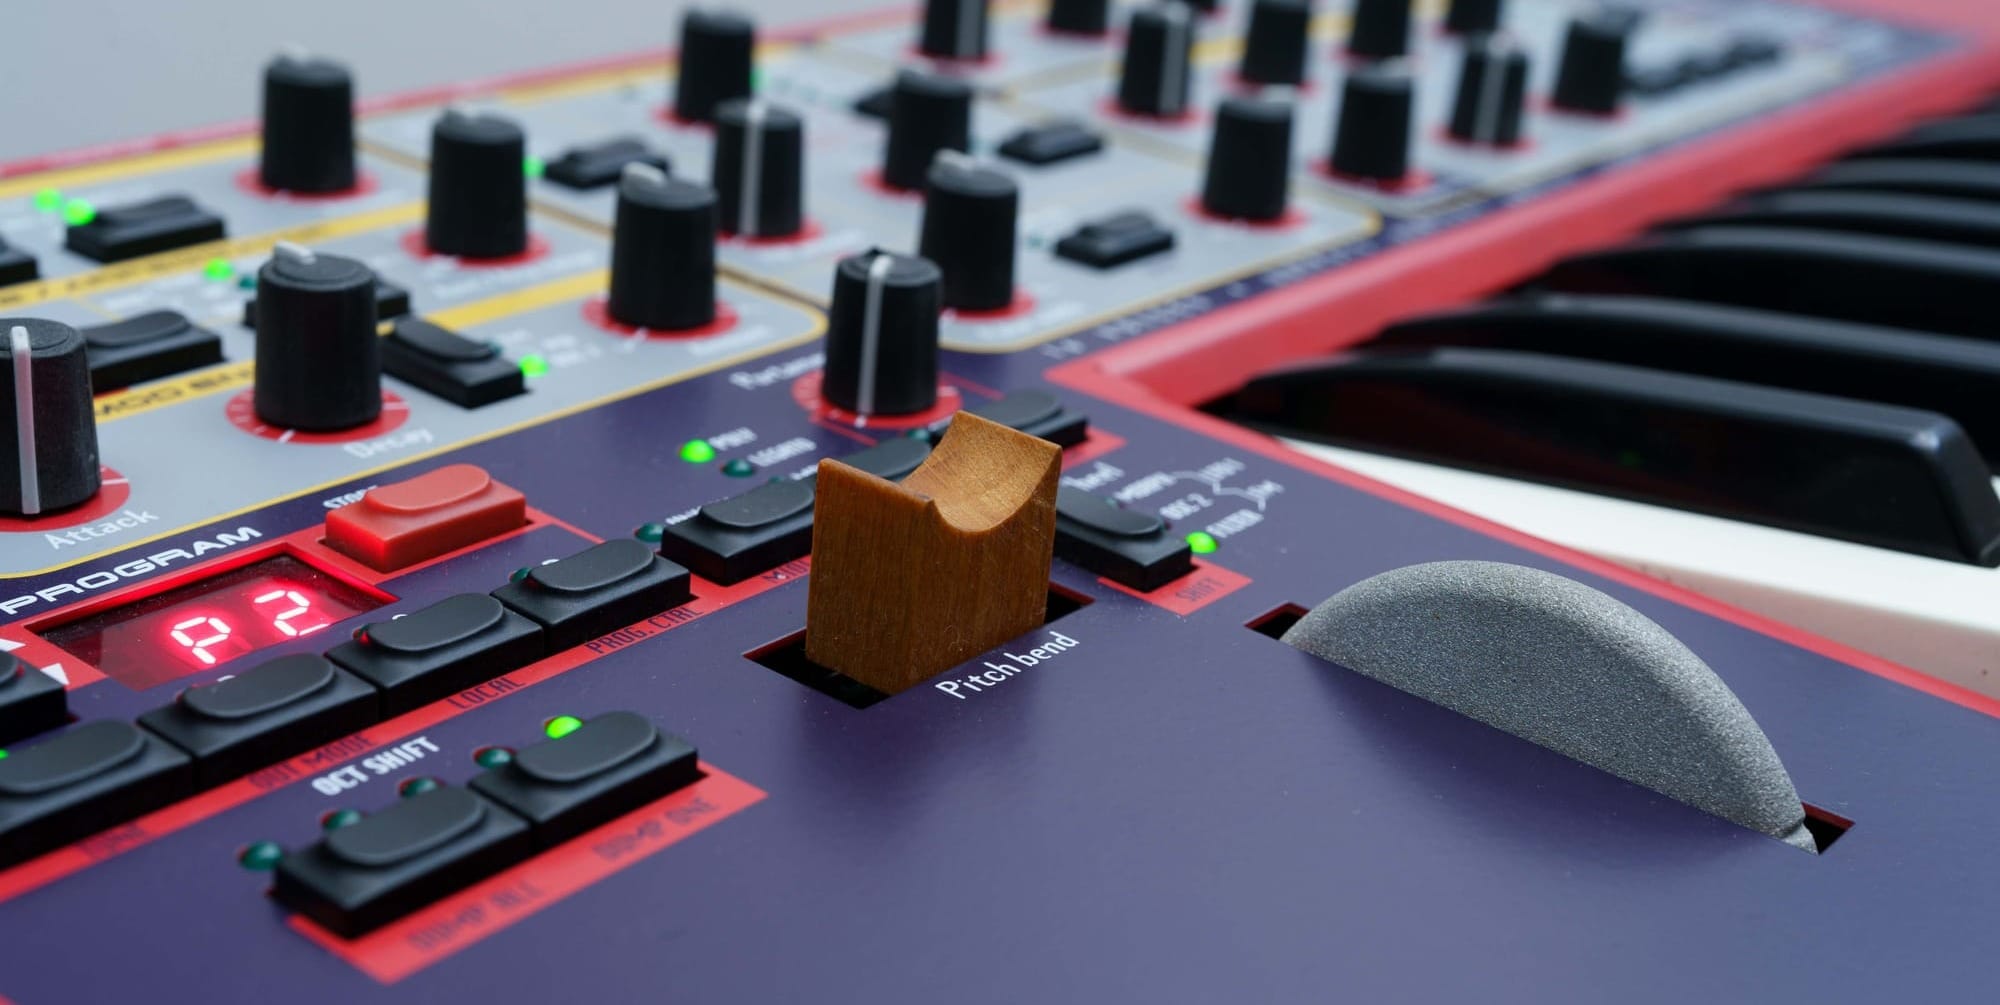
Left-hand control modulation
The controls on the left side of the keyboard place modulations within reach. The most common are pitch bend (direct VCO control) and vibrato (amount of LFO controlling VCO pitch).
JOIN THE CLUB
Become a Pro Member to unlock all articles, interviews, podcast episodes, short documentaries, and more – including all seven ebooks (2000+ pages!). Discover, learn, and get inspired – wherever you are in your synth journey.


Comments